What is the best print resolution in Revit?
In this post I am going to explain the different DPI resolutions available when printing in Revit and how to set these when printing.
What are DPI Resolutions?
In Revit there are four defined DPI Resolutions which controls the quality of prints.
- Low 72 dpi
- Medium 150 dpi
- High 300 dpi
- Presentation 600 dpi
DPI stands for dots per inch, this means the higher the number the more detail will be added per square inch.
Each defined level in Revit represents a doubling of the level of quality to the previous one with Presentation being the highest possible level of quality.

How to set the DPI Resolution when printing
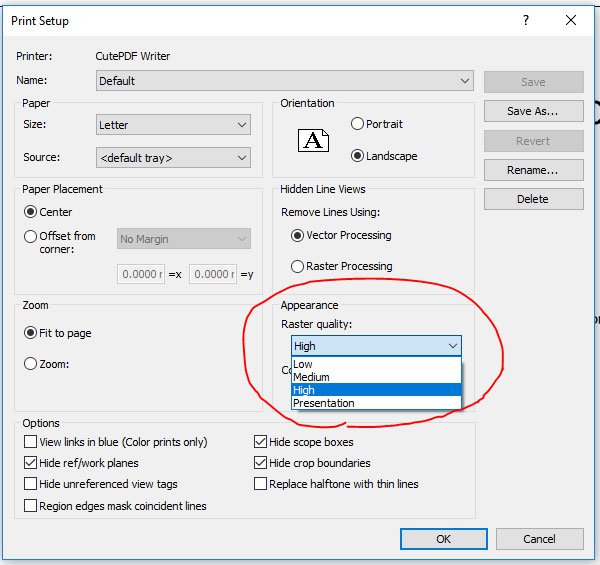
We can set the DPI Resolution in the print dialog box when printing. From the print dialog box under “Settings” click the “Setup” button.
This will open the Print Setup window, in here we can control many aspects including the appearance of the print job. To control the quality of the print we need to look at the “Raster Quality” settings in the Appearance section:
From this dropdown we can control the quality at which Revit will print the current print job. Simply select the quality desired and click the OK button the close the Print Setup Window.
Summary
In Revit we can easily change the quality of any prints in the Print dialog window without affecting the quality of the Revit project. For more information on this blog post, please complete the below form:
Related Links
Autodesk Revit – Autodesk Platinum Partner | Man and Machine
Revit Training Courses – BIM Modelling Skills | Man and Machine