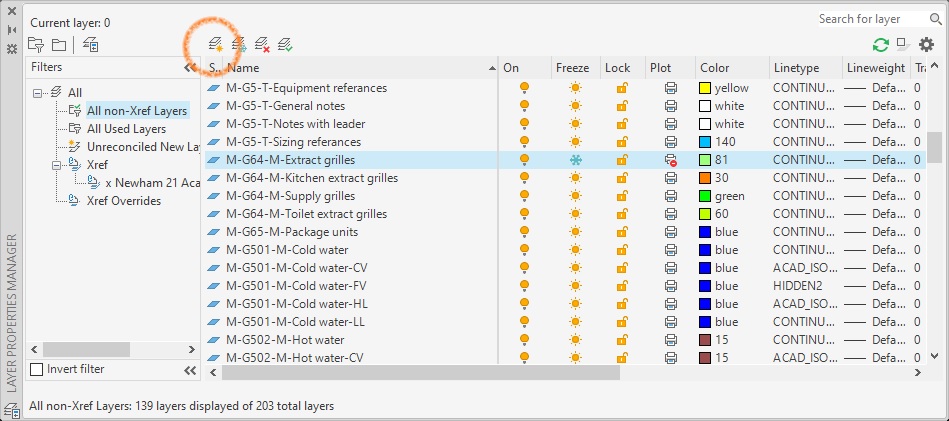
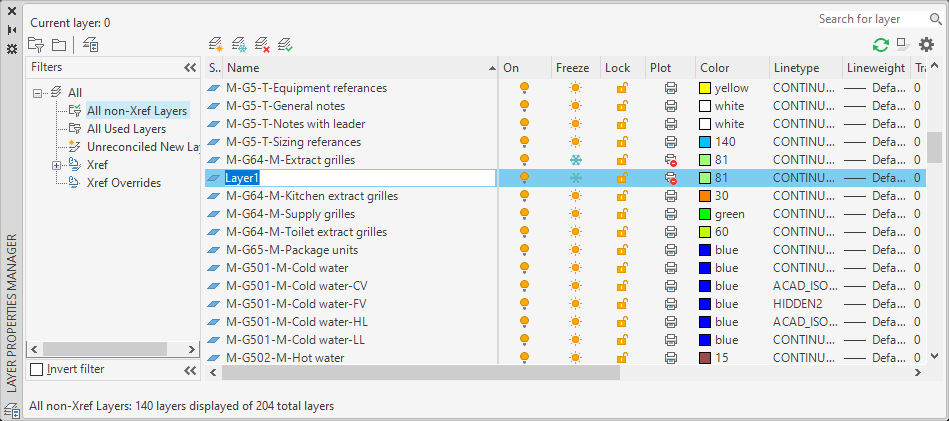
When creating a new layer in our project drawing we can set various parameters for it, the colour and line type style for the layer, line weight, plot style and so on. Rather than setting all these parameters each time we create a new layer, we can find a similar layer with all these parameters already set. We then select that layer in the layer properties dialogue and then create the new layer from there. What happens now is the new layer entry is added directly underneath the layer previously selected, and all the previous selected layer parameters copy down to the new layer.

We can create a new layer by hitting the new layer button at the top (circled) or by pressing ALT and N, selecting first a layer with similar characteristics we want to create from, so in our example we’ll add a layer directly beneath M-G64-M-Extract grilles.

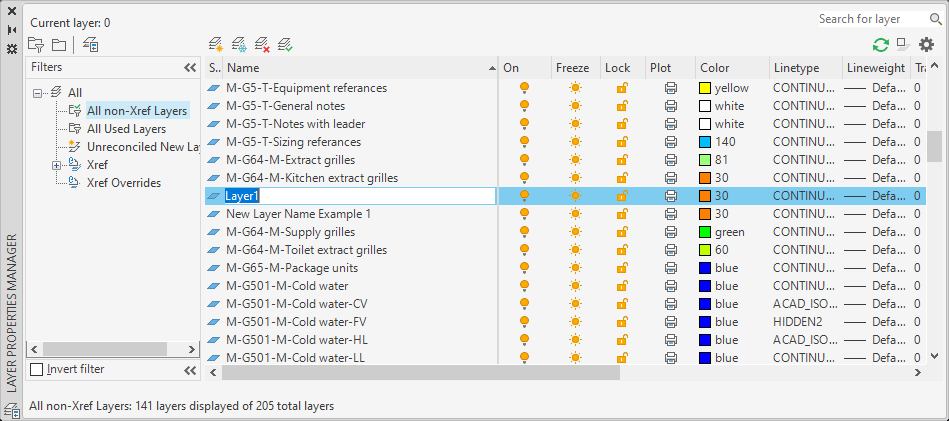
The new layer entry has ‘copied’ the previous layer’s characteristics, we now type in the new layer name. Instead of pressing return after typing in the name, hitting the comma key (,) will create another new layer, again using the same layer characteristics. This can be done as many times as we need to, hitting the comma instead of return after typing each new layer name to create new layer entries directly underneath, hitting the OK button will close the dialogue and save all the new entries.

So there you have it, a really quick way of adding multiple layers using all the settings that are already there from previously defined layers. I hope you found this useful! Take a look at all of our other posts and videos for more useful snippets, if you can’t find an answer or solution for a problem you might be having, make sure you get in touch!
For more information on this blog post or if you have any other questions/requirements, please complete the below form: