As you will see from the below screen shots, you have some default attributes in both plans and projects files area within BIM 360 Docs.


You will see there are some differences between the two areas.
In the plans area, you have fields like Title and Number which are automatically taken from the PDF drawings on upload using the Optical Character Recognition (OCR) technology. Which you can add further attributes as required. I will go through the OCR scanner in a later blog.
General Attributes
Version: This looks at the file version history each time it is saved into BIM 360 Docs. e.g. V1, V2, V3, etc
Last updated: This lists the date and time the file was last updated. e.g. 24 Oct 2019 10:52
Updated by: The last user to update the file within BIM 360 Docs.
Markup: This will highlight any markups which have been made on the file within BIM 360 Docs. This can be private or public markups.
Issue: Similar to markups but instead of the markup a view team place an issue pin to communicate areas of concern or improvement. These can be places on or within a project document such as a drawing or model. Then assigned to a person or organisation to review or correct.
Status: This will display the status of the approval if the file has been included as part of a document review. This is a good way to see if a final has been approved or not within the CDE.
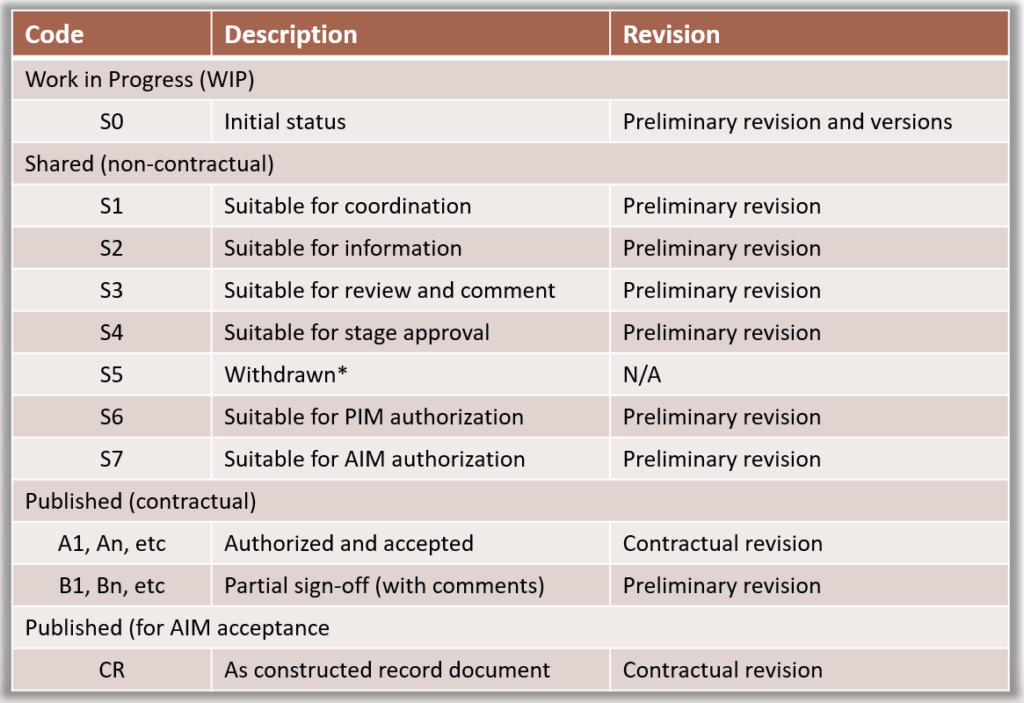
Set: This is known as Document Sets and allows users to group project documents together as a set. So if we are trying to set up BIM 360 Docs as a project CDE based on the ISO 19650 requirements we can use the National Annex NA status codes for information containers to do this.

Adding Attributes
We can add customize attributes to both the plans and project files area. This can be done either at the main folder level or any subfolder level. Note if attributes are added to the main folder, all subfolders below will have the same attributes. If you go down to a subfolder if will only be included as part of that subfolder and any other folders within that. You can see in the below screen shots that fig 3 shows an attribute added at subfolder level, fig 4 at the main folder level and fig 5 the subfolder after both attributes have been added.


I hope you found this blog useful and gained a better understanding of attributes within BIM 360 Docs. To find out more about BIM 360 Docs and useful tips and tricks, please check back our blog page for more useful information or if you would like more information on this blog post, please complete the below form:
Related Links