In 5 simple steps I am going to show you how you can change the serial number in an already activated Autodesk application such as Autocad and Revit to a different serial number.
This is extremely useful if you are managing multiple licenses on multiple serial numbers for your organisation.
Instructions:
You can update the serial number being used by your Autodesk software from within the program.
1. To do this launch the Autodesk software you wish to change the serial number on. (Please note if you have a Suite or Collection installed you will need to update each product individually
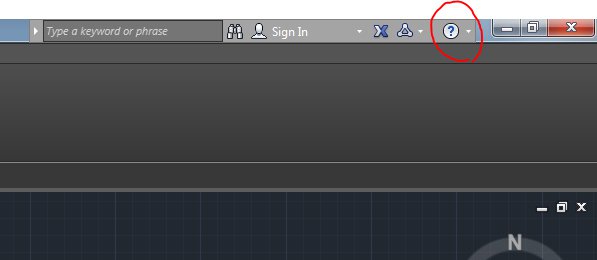
2. Once open you will see a small drop down arrow to the right of a question mark in a circle:

3. From the dropdown, click the option ‘about’

:
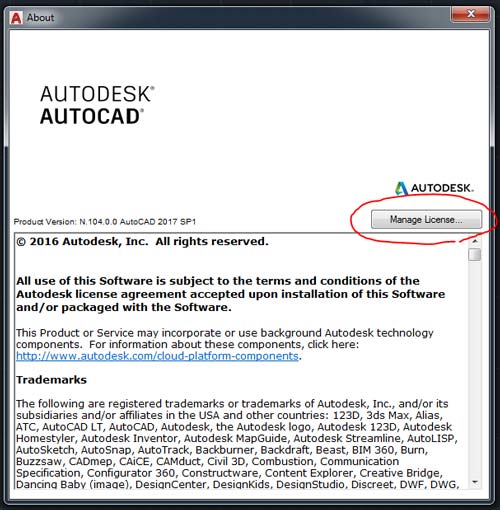
4. This will open the About window, in here you will see the button to manage your license:

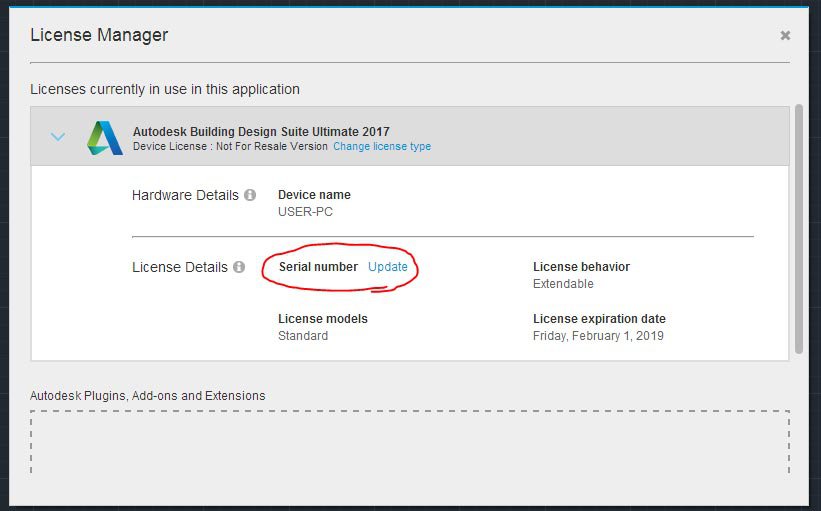
5. Clicking this will take you to your license management screen where you can update the serial number of your Autodesk software:

Conclusion
Managing your Autodesk serial numbers has become a lot easier in recent years. Most of the management with rental licenses can be controlled through accounts.autodesk.com however it is sometimes required to update the serial number originally entered into an Autodesk application. Following the above instruction you can manage your serial number in the application in 5 simple steps. For more information on this blog post, please complete the below form: