Creating a drawing template is generally something that we only do once in a long while. Here’s a three-part general guide to jog your memory when that time comes.
NOTE: There is only one golden rule when creating a drawing template in Inventor, that is… Never overwrite any of Inventor’s default standards, ALWAYS duplicate the standard first. Editing the default standards can lead to errors.
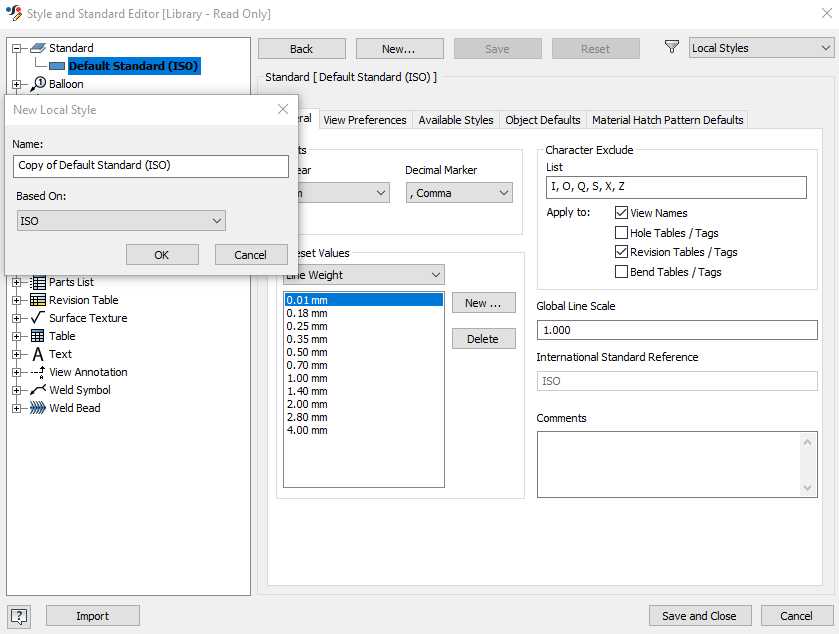
It’s generally best to start with setting up Styles and Standards as creating a title block will require a text style setup beforehand. To get to the Styles and Standards Editor go to the Manage tab and select Styles Editor. This is where the “always duplicate rule” is most relevant. Start by creating a Standard, right click the Default Standard and select New Style. A window to name the standard and base it on an existing standard will appear. Once created make sure it is the active standard by right clicking it and selecting active.

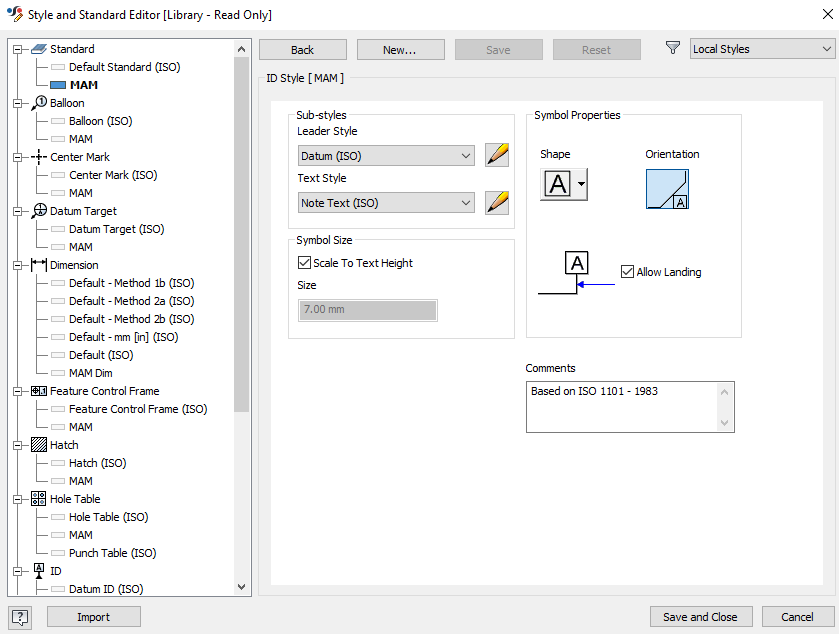
Now it’s the time to go through each standard and set them up to your desired preference. It takes a while but if it’s done right you only need go through it once. As you go down the list you will note a need to jump back and forth, as certain standards need to be linked to others. An example of this is text, most standards link a text style so starting with a text style is a good idea.

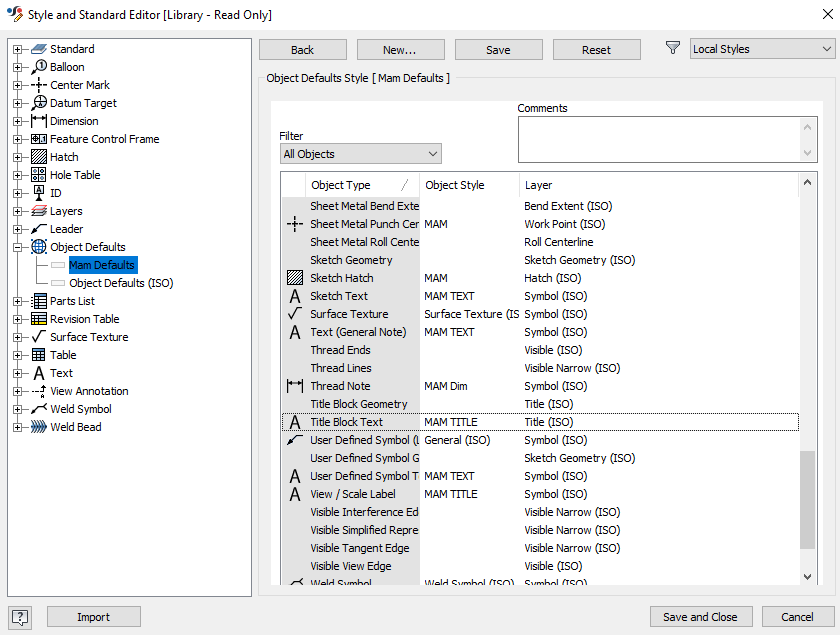
Once all the required standards have been edited to suit, the last step is to set all the customised standards as object defaults.

Once the Styles and Standards are complete select Save and Close. The next step is to setup a border and then a title block. To learn more about this refer to part 2 and 3 of this guide: Creating an Inventor Drawing Template Part 2 of 3: Border and Creating an Inventor Drawing Template Part 3 of 3: Title Block.
For more information on this blog post or if you have any other questions/requirements, please complete the below form:
Related Links
Autodesk Inventor – Autodesk Platinum Partner | Man and Machine
Autodesk Inventor Training Courses | Man and Machine
Inventor Training – Solid Modelling Introduction | Man and Machine