Introduction
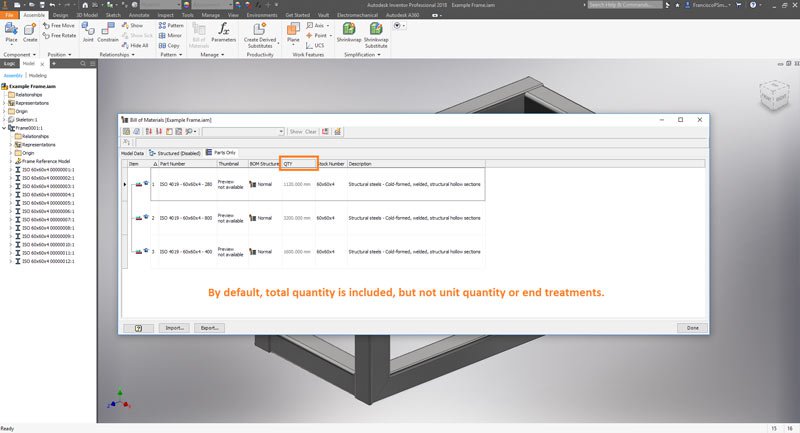
Inventor’s Frame Generator excels at producing a frame model quickly and easily. However, while it will happily produce a Bill of Materials (BOM) for the frame, it will not be optimal by default – the total length of unique segments (rather than unit lengths and quantities) will be written, and it will omit end treatments (like mitres and cuts) entirely.
This guide will illustrate how to customise a frame’s BOM to be a proper cutting list in Inventor by fixing these shortcomings. It is applicable both to the BOM in the 3D model, and the parts list on a drawing.
The Default BOM
By default, the BOM will reveal some useful information about the frame, including:
– The part number of each member
– The sum total length of each member type
– Stock numbers
– Descriptions
However, crucially, the following are missing:
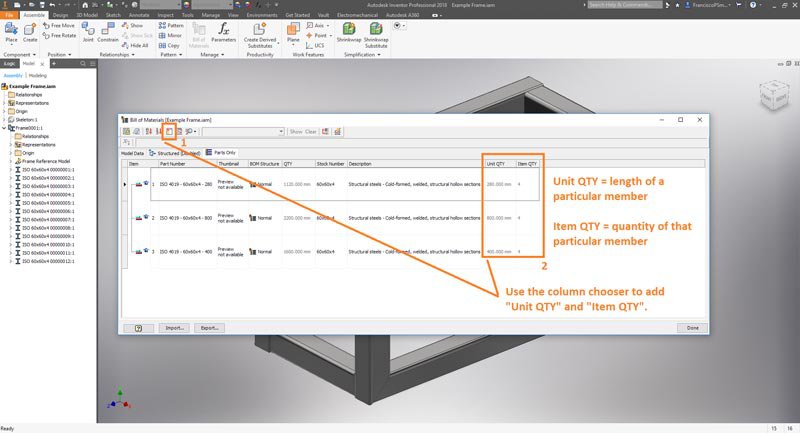
– Unit QTY: The length of a particular member
– Item QTY: The quantity of a particular member
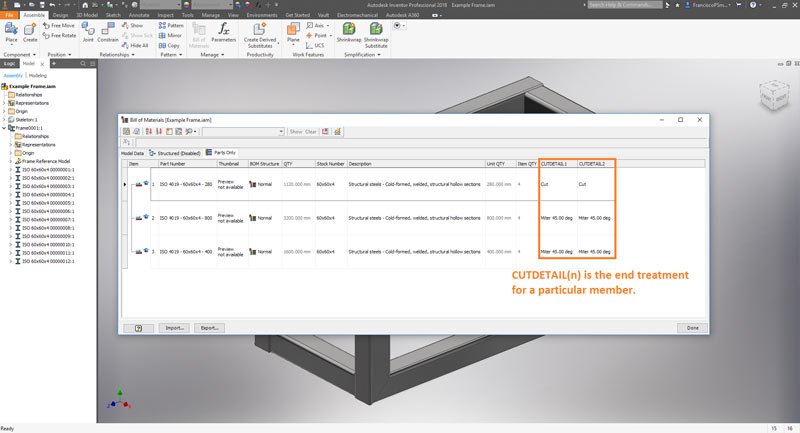
– CUTDETAIL(n): The end-treatments on the member
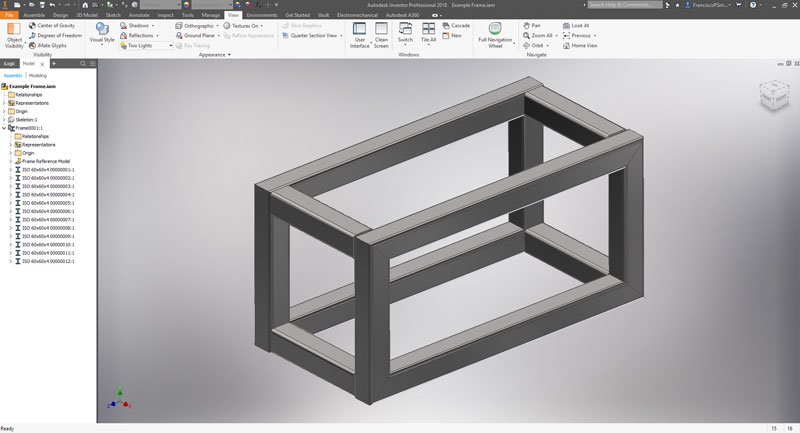
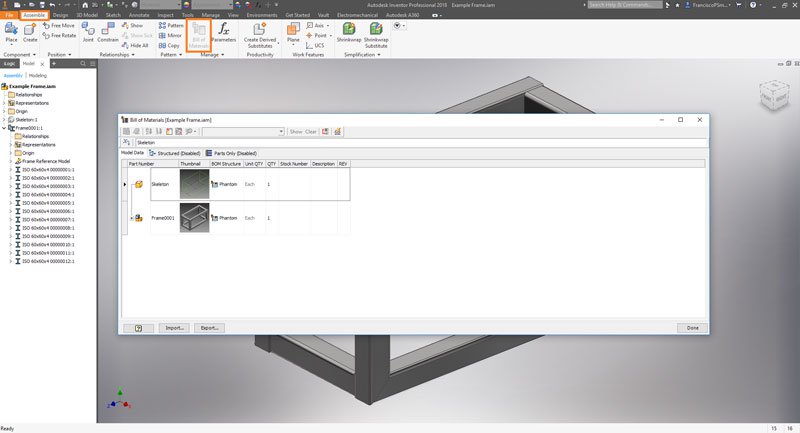
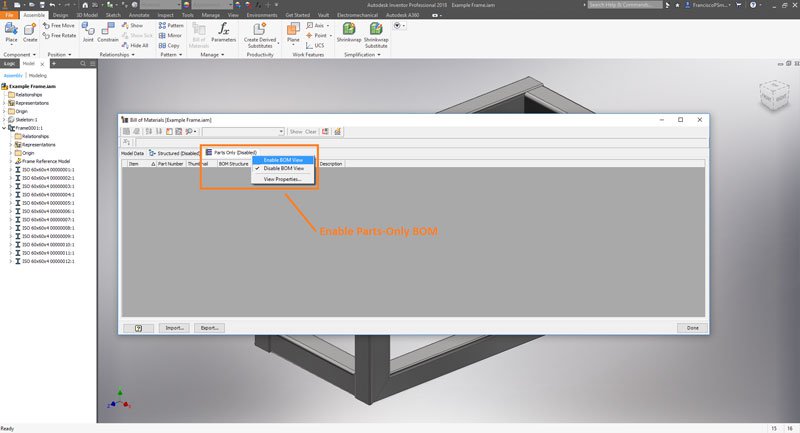
Below is an illustrated guide on pulling up the BOM in the assembly environment.
Listing unit quantities and lengths in the BOM
To include the unit quantity (i.e. length of an individual member) and the item quantity (the quantity of a particular member), click the “Column Chooser” icon at the top-left of the BOM dialogue. Double-click “Unit QTY” and “Item QTY” to add them to your BOM.
Listing end treatments in the BOM
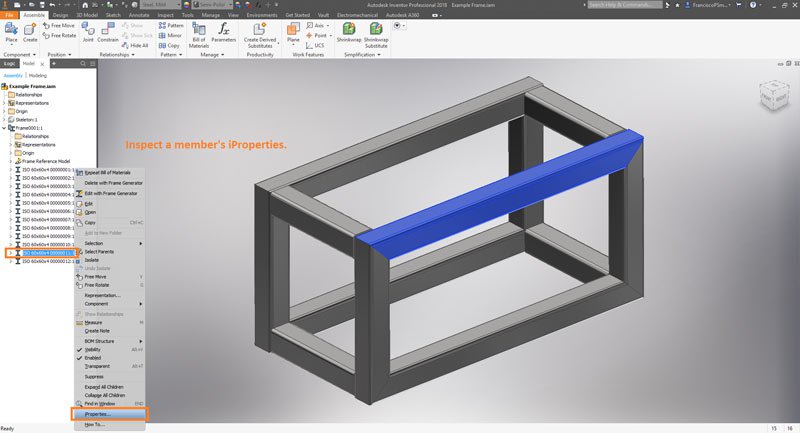
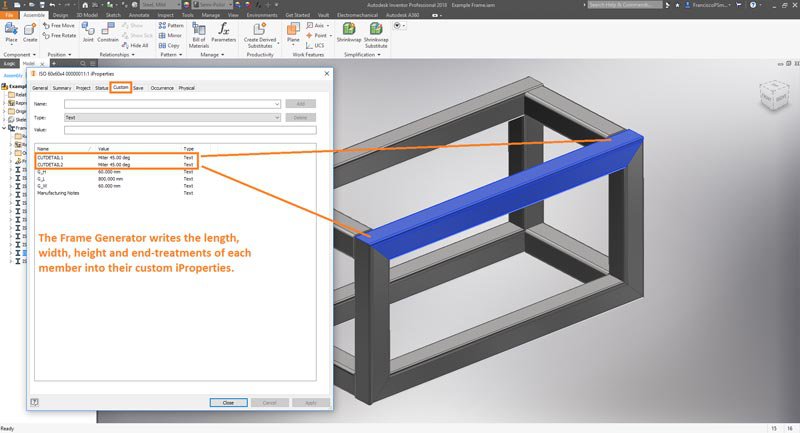
When a frame member is created in Inventor, it becomes an individual part (that exists in the assembly file of the frame). In the Custom iProperties of each member, there is written the length, width, height and operation(s) performed as each end; these are the end-treatments, and bear the names “CUTDETAIL1”, “CUTDETAIL2”, “CUTDETAIL3”, etc… These custom iProperties are what get dredged up in the BOM to indicate the end-treatments of the frame members.
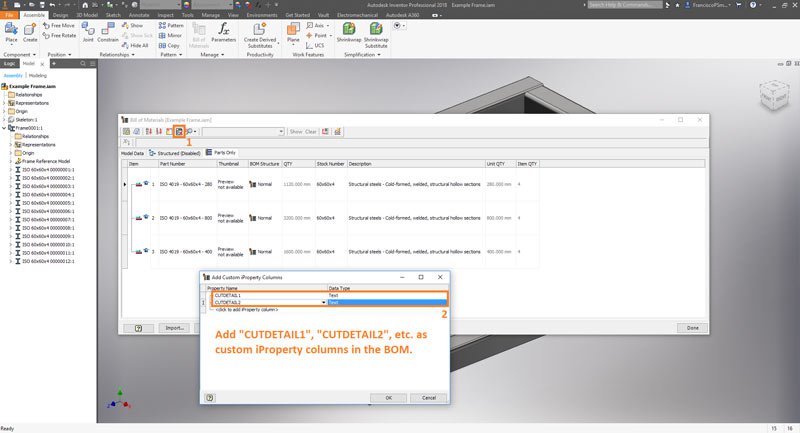
To include a custom iProperty in the BOM, click the icon “Add Custom iProperty Columns”. This will bring up a dialogue into which you can manually enter your custom iProperties. In this case, type “CUTDETAIL1” and “CUTDETAIL2” (ensure that the capitalisation and spacing is exactly the same as in the iProperties). Click “OK” to add these to the BOM. Now the BOM includes not only the unit quantities and lengths, but also the end treatments of each of the members – a proper cutting list!
For more information on this blog post, please complete the below form:
Related Links
Autodesk Inventor – Autodesk Platinum Partner | Man and Machine