Did you know that you can create a schedule of your views in Revit? This is useful if you want to double check the settings of your views or if you want to update a setting on multiple views easily without having to go into every view.
How to Create a Schedule of a View
In Revit there is the ability to create what is called a view list. A view list is essentially a schedule of your views. To create a view list just follow the below instructions.
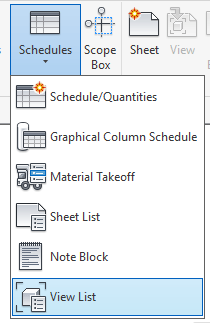
1. In your Revit project go to the “View” tab located on the ribbon bar.
2. In the section “Create” find “Schedules” and click on “View List” at the bottom of the drop down menu.
3. In the View List Properties window select the properties you want to be included in your view schedule
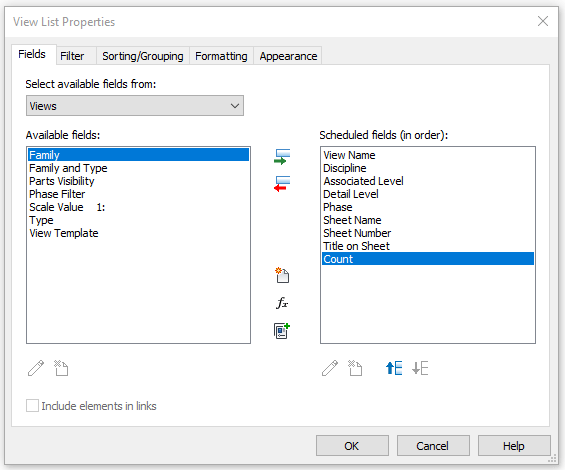
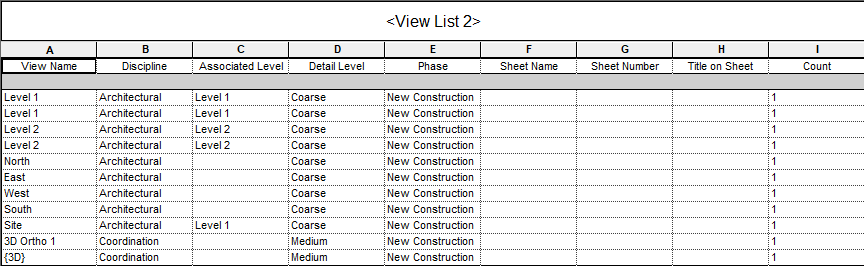
4. Once you have selected the properties you want, click OK. Revit will now create a schedule for your views with the selected properties.
The schedule is also linked to the views, so updating any values on the schedule will automatically update the views too.
Conclusion
View lists are really useful for double checking the settings of all your views in one place. As the schedule is linked to the views, it also makes updating any settings easy.
For more information on this blog post or if you have any other questions/requirements, please complete the below form:
Related Links
Autodesk Revit – Autodesk Platinum Partner | Man and Machine
Revit Training Courses – BIM Modelling Skills | Man and Machine