In Recap we can we can move the points onto various layers of our choosing such as Floors, Walls, Ceilings or Furniture for example. This allows us to more easily manage point cloud scans and access the information we are interested in.
Although we can do some basic interrogation of the point cloud scan within Recap, in most cases we will likely want to use this data in other applications such as AutoCAD or Revit.
it is unlikely we will want to export everything, as even if we did, we will still want to ignore any noise which was picked up on the scan. Also by exporting everything as multiple layers and not one big point cloud scan allows us to turn on and off these layers in other applications.
It goes without saying that you will need to have created the layers and moved the points onto these before exporting. Creating and managing layers will be covered in a separate blog.
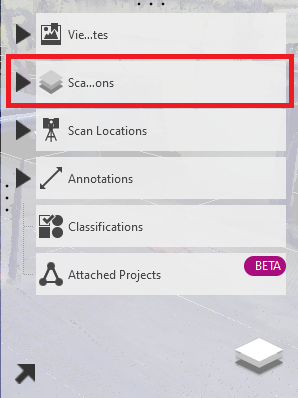
1. Go to the Project Navigator

2. Expand Scan Regions
3. Turn Off All Layers
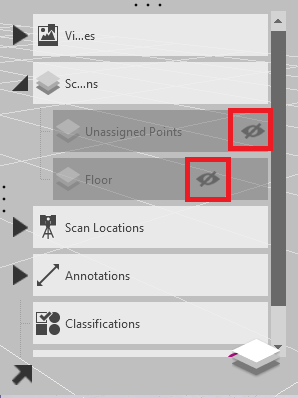
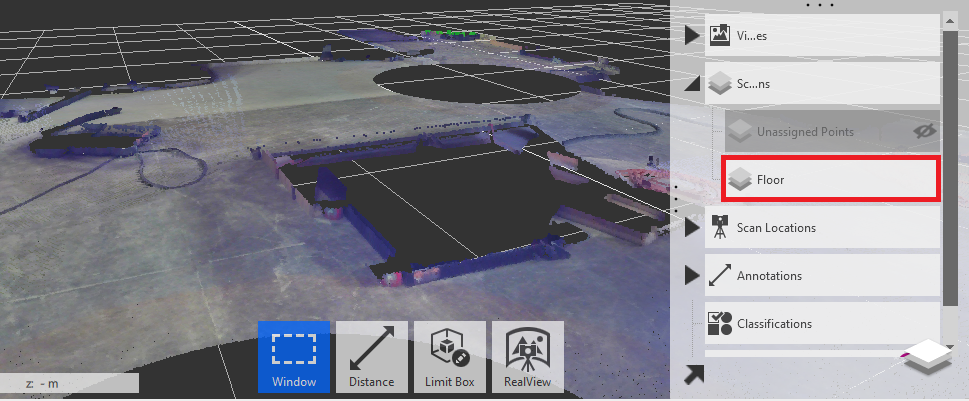
4. Turn On Only The Layer To Be Exported
5. Go Back to Scans, and Click Export Regions
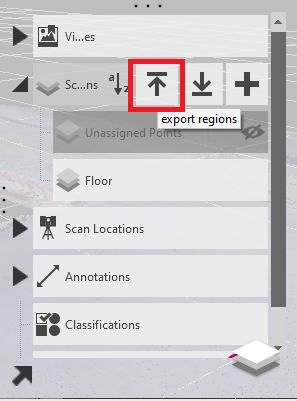
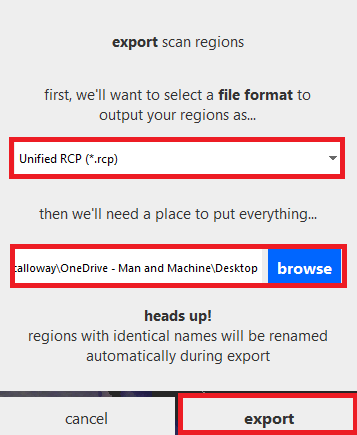
6. Choose File Format and Location, then Click Export
This is a great way to manage your point cloud scans before importing it into other applications. Simply having the ability to turn on and off or load and unload the layers which you want to see, will make working with point scans so much easier and will reduce the strain you are putting on your computers and laptops.
You can find more information on the Autodesk Recap Help website.
For more information on this blog post or if you have any other questions/requirements, please complete the below form: