In this blog I will explain how you can save a Revit family out of an existing project. Perhaps you have received a project with a family you would like to reuse elsewhere or perhaps you have modified an existing family in a project and want to save it out.
Following the below instructions I will show you have to save a Revit family out of an existing project.
First of all you have to understand that there are different types of families in Revit. System families such as walls, floors, roofs & ceilings cannot be saved out of a project using the below instructions and will be covered on a different blog.
For your traditional families such as furniture, doors, windows etc use the below method.
1. Place an instance of the family in the project or select an instance already in the project.
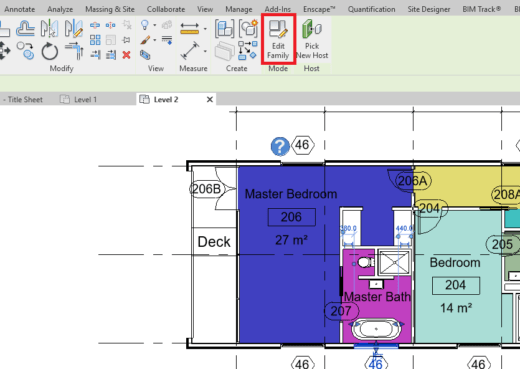
2. In the ribbon bar on the Modify tab click the button for Edit Family.

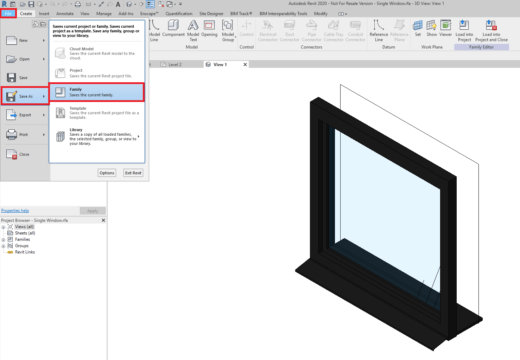
3. This should takes you into the family editor, from here go to File -> Save As – > Family.

4. Select a location and name and save the family.
Congratulations, you have now saved the family out of the Revit project and is available for you to use on future projects.
For more information on this blog post or if you have any other questions/requirements, please complete the below form:
Related Links
Autodesk Revit – Autodesk Platinum Partner | Man and Machine
Revit Training Courses – BIM Modelling Skills | Man and Machine