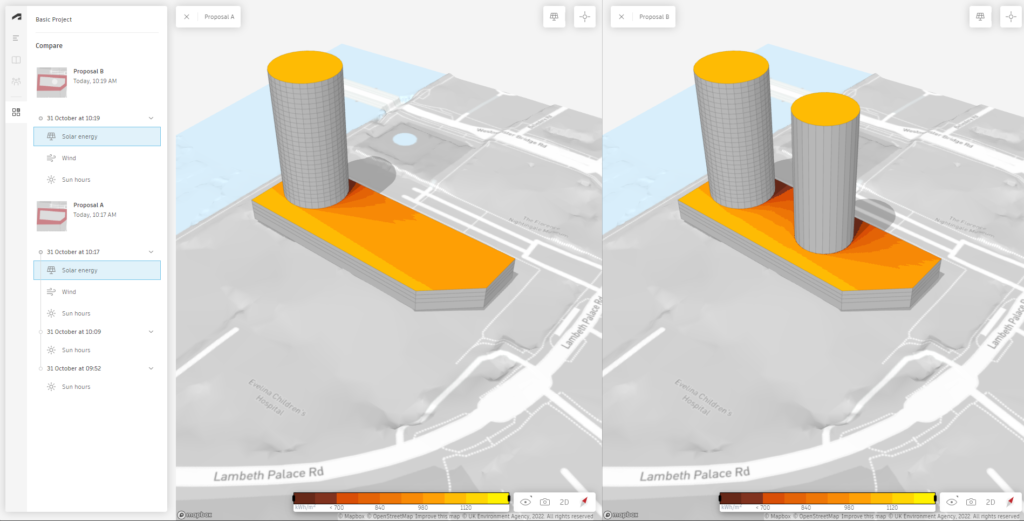
In Autodesk Forma we have a number of analysis tools at our disposal, including a Solar Energy analysis. This could be useful, for example, if we are looking to place solar panels on the project and want to look for suitable locations.
The Solar Energy tool is simple to use and I will take you through it in this blog.
How To Perform A Solar Energy Analysis
Firstly, open your Forma project, As you can see in the image bellow, we have a large roof area which may be suitable for solar panels, however the tower could potentially cast a shadow effecting how much of the roof would be suitable.
On the Analyse menu on the right, select the button for Solar Energy (the solar panel icon).

From here we can view past analyses, or run a new analysis, by clicking the Run Analysis button.
Forma will now analyse the project. Depending on the complexity of the model this may take several minutes to run.
Once complete, you can access the results by clicking on the View History button and selecting the latest test.

At any time you can use the Inspect tool in the top right, (cross-hair icon), to pick points within the model and extract the data for specific locations.
Also on the right, the Solar Energy Analysis window will display data such as potential solar energy output and average per m2.
We can also customise the settings for potential surface coverage and efficiency of solar panels.
Should we have multiple proposals, we can compare the results side by side using the Compare tool.

For more information on this blog post or if you have any other questions/requirements, please complete the below form: