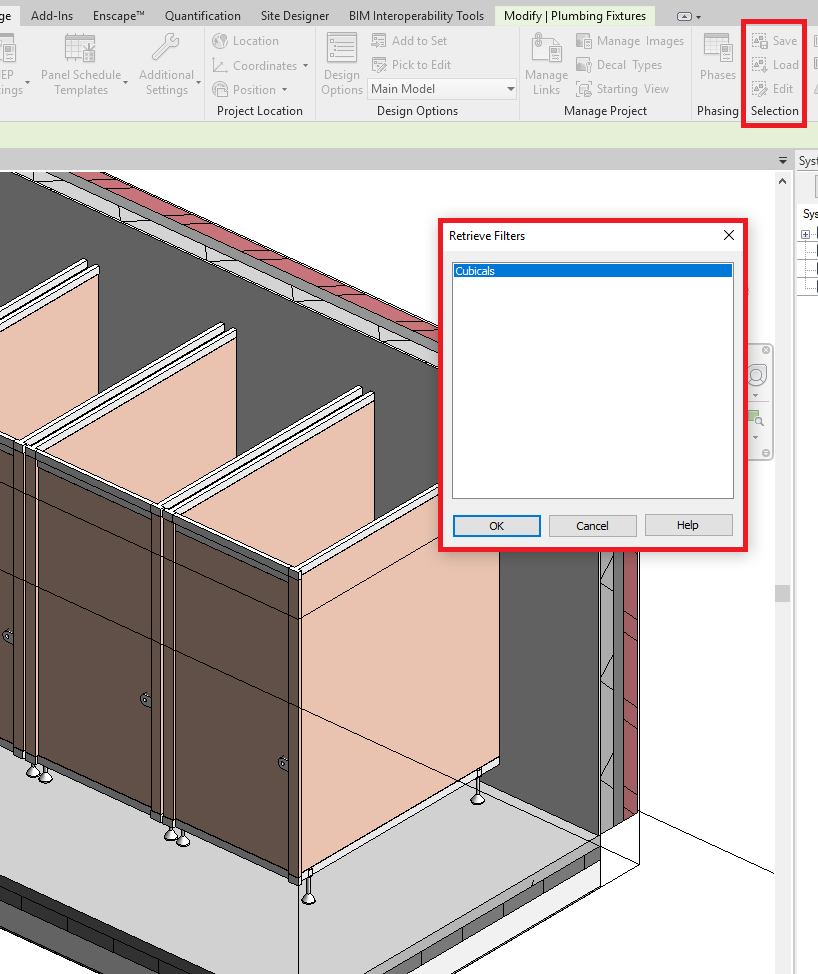
In Revit we can save selection sets if we have a group of elements we know we will want to easily select again.
Creating Selection Sets
- Select all the elements you wish to save as a Selection Set.
- Go to the Manage tab in the Ribbon bar.
- In the grouping “Selection” click the Save button.
- You will be prompted to give your selection a name.

To load a previously saved selection set:
- Go to the Manage tab in the Ribbon bar.
- In the grouping “Selection” click the Load button.
- Select the selection set which you have previously saved and click OK.
All elements in the selection set will now be selected.
Conclusion
Selections sets are extremely useful when working with the same elements more than once especially if you find you are spending time using multiple selection or filters to try and reselect the elements.
For more information on this blog post or if you have any other questions/requirements, please complete the below form:
Related Links
Autodesk Revit – Autodesk Platinum Partner | Man and Machine
Revit Training Courses – BIM Modelling Skills | Man and Machine
Revit Architecture Training – Platinum Partner | Man and Machine
Autodesk AEC Collection – Platinum Partners | Man and Machine