In Revit it is highly likely that you have some form of view template applied to your views, however there may be occasions where you need to quickly apply a different template for a moment.
Changing the view template isnt a difficult proccess but constantly changing it and changing it back just to check something can be time consuming.
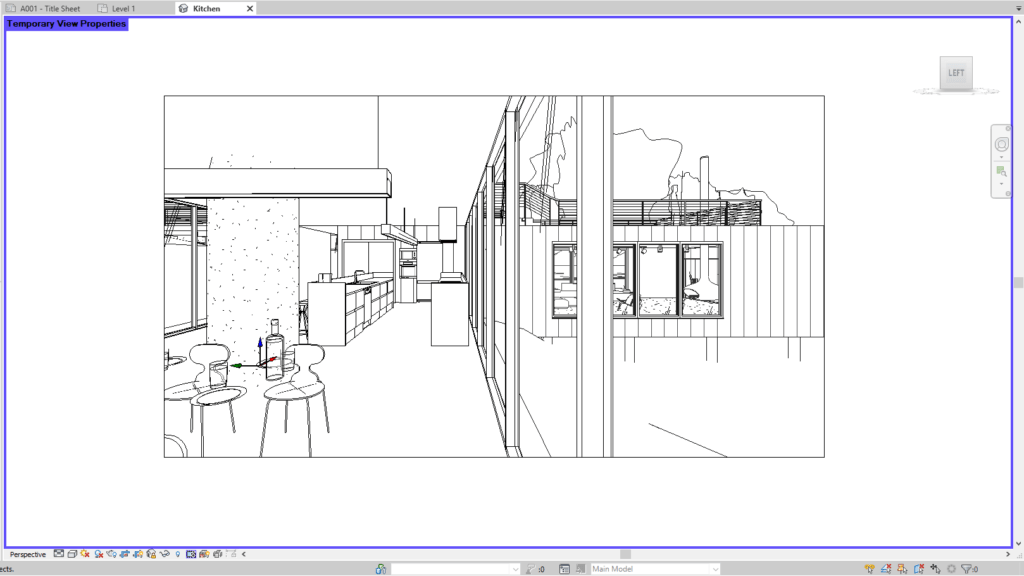
By applying a tempoary view template we can quickly flick between different view templates without applying it to the view.
Applying A Temporary View Template
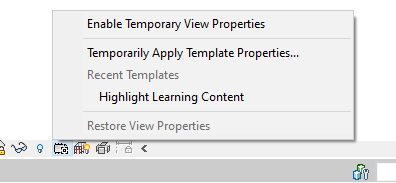
You can find the Temporary View Template button at the bottom of the main work area:

Clicking the Temporary View Template button presents you with a menu with a few options.

Firstly is “Enable Temporary View Properties”. Select to enter a temporary view mode. Changes made to the view instance properties are visible until cleared or Restore View Properties is selected.
Secondly we have “Temporarily Apply Template Properties”. This opens the view template window and allows us to select and even customise a view template to temporarily apply.
Thirdly is “Restore View Properties”. This clears any of the temporary changes we have made and restores the view back to its origional settings.

Conclusion
Temporary View Templates saves time and makes working easier, the button is easily accessible at the bottom of Revit so no need to go looking for it.
For more information on this blog post or if you have any other questions/requirements, please complete the below form:
Related Links
Autodesk Revit – Autodesk Platinum Partner | Man and Machine
Revit Training Courses – BIM Modelling Skills | Man and Machine
Revit Architecture Training – Platinum Partner | Man and Machine
Autodesk AEC Collection – Platinum Partners | Man and Machine